A Step-by-Step Guide to Painting Bathroom Walls
- Real Estate
- August 10, 2023
- No Comment
- 30
Introduction to Painting Your Bathroom Walls
Painting your bathroom walls is a cost-effective and impactful way to refresh the space and give it a whole new look. Whether you’re aiming to create a relaxing oasis or add a pop of color, painting can transform your bathroom. In this step-by-step guide, we’ll walk you through the process of painting your bathroom walls to achieve professional-looking results.
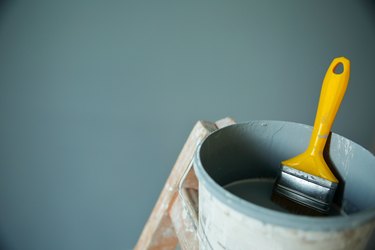
Materials and Tools You’ll Need
Before you start, gather the necessary materials and tools:
- Paint: Choose a high-quality bathroom-specific paint with a finish suitable for moisture-prone areas.
- Primer: Use a water-based primer designed for bathrooms to create a smooth surface for paint.
- Paint Roller: A roller with a medium nap is ideal for covering large areas quickly.
- Paintbrush: A brush with synthetic bristles works well for cutting in around edges and corners.
- Painter’s Tape: Use painter’s tape to protect areas you don’t want to paint, such as trim and fixtures.
- Drop Cloths: Cover the floor and any fixtures to prevent paint splatters.
- Sandpaper: Lightly sand the walls to create a smooth surface before painting.
- Cleaning Supplies: Ensure the walls are clean and dry before painting.
- Ladder: A sturdy ladder is essential for reaching high areas.
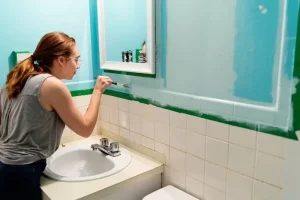
Preparing the Bathroom for Painting
- Clear the Space: Remove any items from the bathroom to create a clear workspace.
- Protect Fixtures: Cover fixtures like faucets, towel bars, and mirrors with painter’s tape and plastic.
- Repair Imperfections: Patch any holes or cracks in the walls and sand them smooth.
- Clean the Walls: Wipe down the walls with a mild cleaner to remove dirt and grime.
Step-by-Step Guide to Painting Bathroom Walls
- Apply Primer: Start by applying a coat of primer to the walls. Allow it to dry according to the manufacturer’s instructions.
- Cut In: Use a paintbrush to “cut in” along edges, corners, and areas where the roller can’t reach. This ensures clean lines.
- Roll on Paint: Use a roller to apply the paint to the larger wall surfaces. Start from the top and work your way down.
- Apply Second Coat: After the first coat is dry, apply a second coat of paint for even coverage and a professional finish.
- Remove Painter’s Tape: Carefully remove the painter’s tape while the paint is still slightly wet to avoid peeling.
Tips for a Smooth Painting Process
- Ventilation: Ensure proper ventilation by opening windows or using a fan to help the paint dry faster and reduce odors.
- Thin Coats: Apply thin coats of paint to prevent drips and achieve a smoother finish.
- Drying Time: Follow the paint manufacturer’s recommendations for drying time between coats.
- Avoid Overloading the Brush or Roller: Excess paint can lead to uneven application and drips.
Finishing Touches and Cleanup
- Inspect Your Work: After the final coat is dry, inspect the walls for any missed spots or imperfections.
- Replace Fixtures: Once the paint is fully dry, remove the protective coverings from fixtures and reattach them.
- Cleanup: Clean your brushes, rollers, and other tools promptly to prolong their lifespan.
- Enjoy Your Newly Painted Bathroom: Step back and admire the fresh new look of your bathroom!
Conclusion
Painting your bathroom walls is a satisfying DIY project that can significantly enhance the appearance of the space. With the right materials, proper preparation, and attention to detail, you can achieve professional-quality results. Transform your bathroom into a more inviting and visually appealing room with a fresh coat of paint, adding your personal touch to the heart of your home.